🔥 Spring Festival holiday sales promotion up to 10% Discount
This rocket uses the power of compressed air to launch into the sky. (Budding engineers take note: This is called pneumatics!) By Ana Dziengel,Babble Dabble Doo
Empty juice pouch; one flexible straw (that comes with the pouch); one standard straw; colored cardstock; washi tape (optional); modeling clay
What To Do:
(1) Snip off the end of the flexible straw on an angle.Note: If after some use, one of the straws cracks, simply replace it with a new one.

This simple machine uses stored energy (the tension in the rubber bands) to release a projectile (called the payload). Play around with the position of the stopper to get the maximum angle and distance for your launch—and have fun with colors and decorations. By Curious Jane
What You'll Need:
Hole punch; rectangular box; three unsharpened pencils; a few strong rubber bands; masking tape or glue; jar lid; paper clip
What To Do:
(1) Punch a hole in a long side of the box, 3 inches from a short side. Punch a matching hole on the other side. The holes should be large enough for a pencil to rotate easily. Punch a third hole on the opposite short side; it should be centered and near the bottom.
(2) Assemble the catapult arm: Join 2 pencils together perpendicularly to make an inverted lowercase t; secure them with rubber bands.
(3) Tape or glue a small jar lid to the longer end of the arm as shown.
(4) Wrap another rubber band around the shorter end of the arm using a slipknot.
(5) Place the ends of the horizontal pencil in the side holes. Thread the tail of the slipknot (from Step 4) through the remaining hole, and knot a paper clip around the end to hold it in place.
(6) Create a “stopper” for the catapult arm with the third pencil. Place it across the top of the box just in front of the arm; secure it in place by wrapping a large rubber band around one end of the pencil, under the box, and up and around the other end.(7) Load it up and let 'er fly.

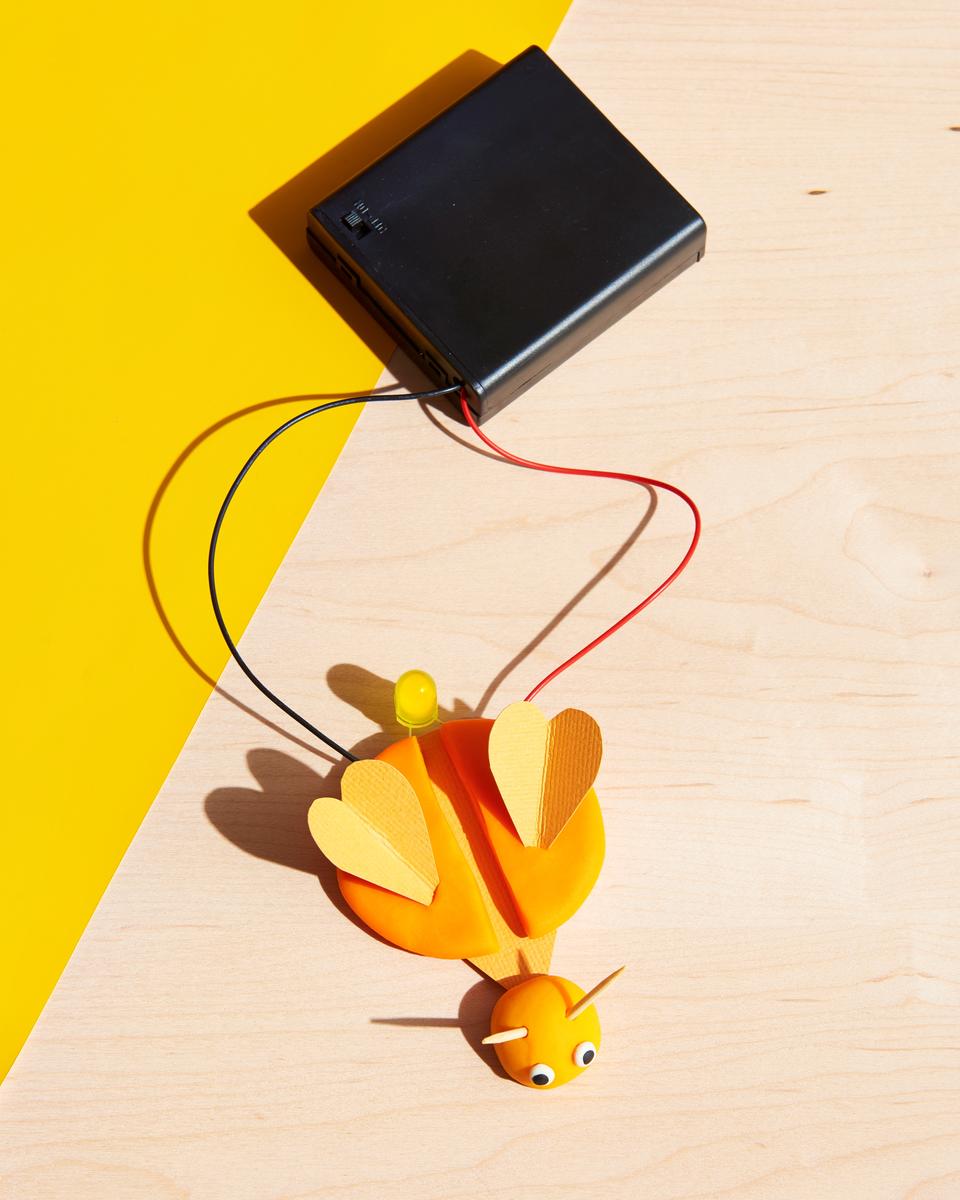
In this STEM activity, kids will create a simple closed circuit to make their bug glow. Who knew that Play-Doh could conduct electricity? There are a few extra rules for this activity, though: Adult supervision and safety glasses are required. You’re working with electricity, after all. And never touch battery-pack wires to each other or attach LEDs straight to the battery-pack wires. This can lead to overheating or damage. By Anne Carey, Left Brain Craft Brain
What You'll Need:
Cardstock; Play-Doh; 10mm diffused LED bulb with leads; four AA batteries; four AA battery pack with leads (Find the bulb and battery pack wherever electrical supplies are sold.)
What To Do:
(1) Cut an oval cardstock base for the bug and two heart-shaped wings.
(2) From Play-Doh, make the head and two separate, oblong sides; place them on the paper base. (Make sure the side pieces don’t touch each other or the bug won’t light up.) Add eyes and antennae as you like.
(3) Look at the leads of the LED. The longer one is the positive lead, and the shorter one is the negative. Pull the leads apart, and stick one end into each side of the body. Remember which side has the positive lead.
(4) Insert the batteries into the battery pack. Stick the red wire into the side with the positive LED lead; put the black wire into the other.
(5) Turn on the battery pack and watch the bug glow!Note: If your bug doesn’t light up, turn the LED around and insert the long lead into the other side of the body.

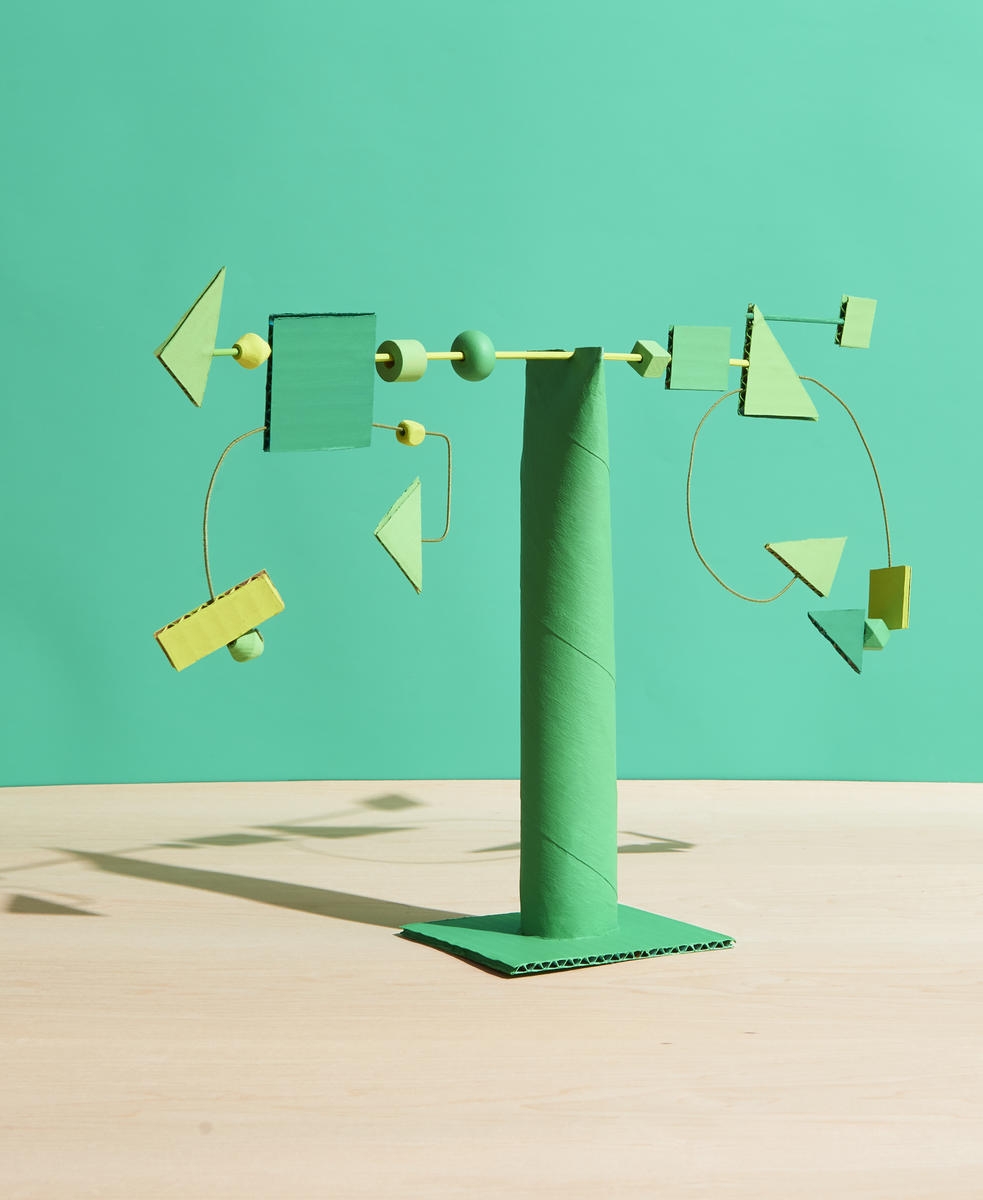
Looks are only half the challenge in this STEM activity for kids. Your budding builders will need to be patient as they test to find the sweet spot to make it balance! By Ana Dziengel
What You'll Need:
Cardboard; craft paint; paper-towel tube; 5-inch square piece of cardboard; hot glue; floral wire or pipe cleaners; beads; 12-inch bamboo skewer with sharp ends snipped off
What To Do:
(1) Cut the cardboard into shapes; paint. Paint the paper-towel tube and square piece of cardboard. Let dry.(4) Thread cardboard shapes, wire, and beads onto a long skewer, balancing and adjusting it on the notch. Continue adjusting, using tape if needed for security, until sculpture is balanced.

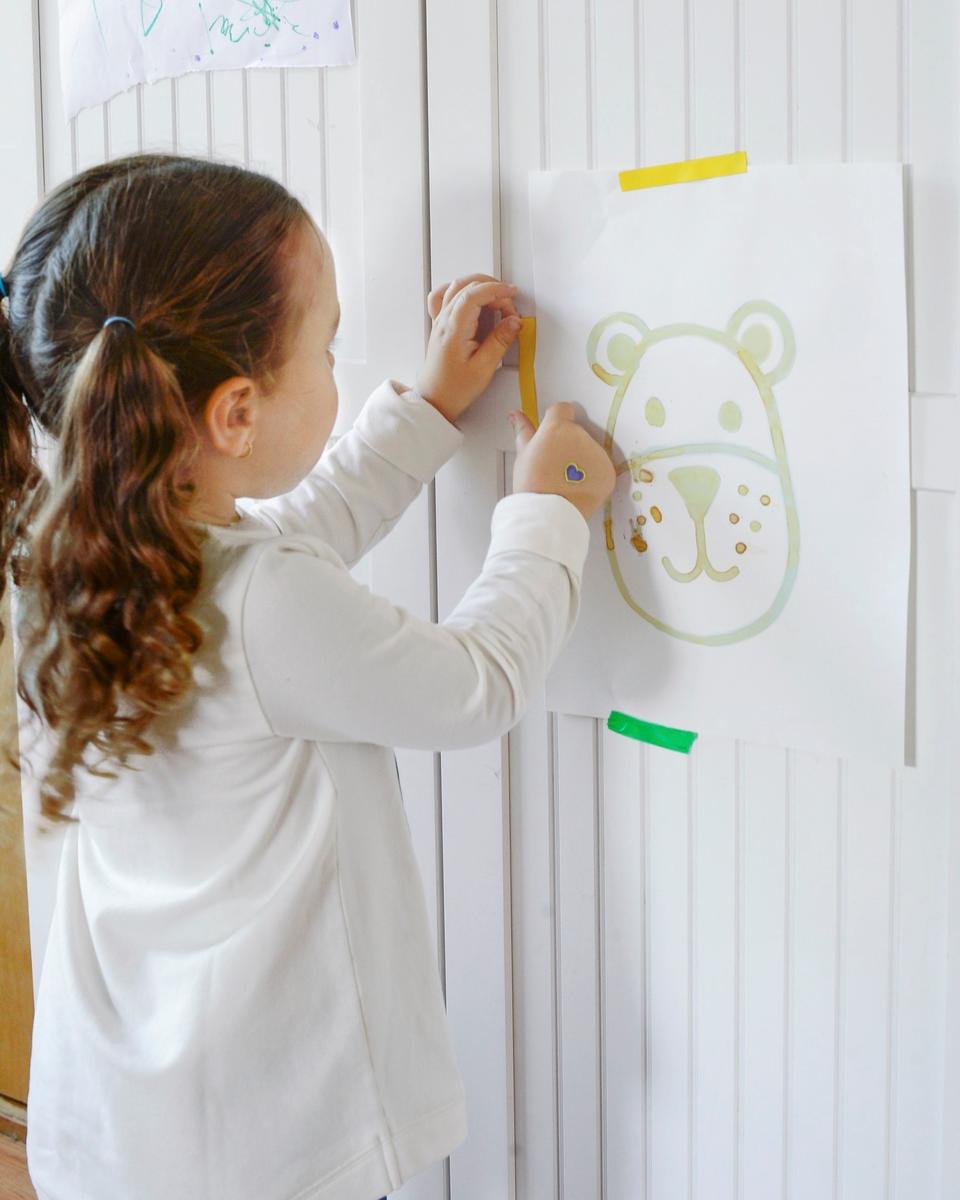
When life gives you lemons, make a secret message from invisible ink! Mail it to a friend or relative, include tips on how it works, and let them bring the image or note to light.
One lemon; cotton swab; sheet of white paper, sun, iron, or lightbulb
(3) The message will be revealed! Hang it as artwork or share it with a friend.
